Pixie II v5.1 40 m QRP xcvr Kit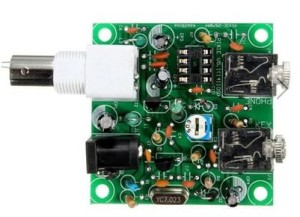
This small kit is a version of the old Pixie II, two transistor, direct-conversion CW “transceiverâ€. Many Pixie IIs were made using Manhattan or dead bug technique. Now a Chinese PCB version is available   on line at such a low price that you will say:
“how can I not build this and try it on the airâ€.
In this application note I will share some of my experiences and suggestions regarding the kit. The first question that occurred to me was: “Is such a simple circuit effective as a communications device?â€Â The answer is yes, but with severe limitations. In any event it is a fun project well worth the money.
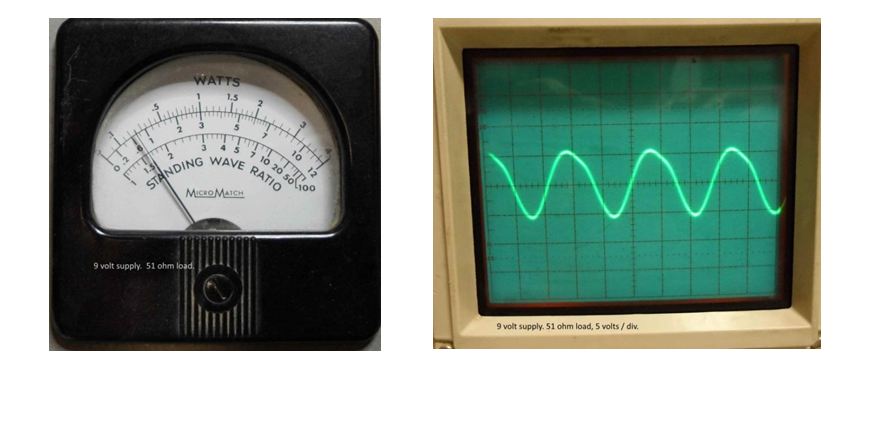
The circuit is simple and mostly self-explanatory. It incorporates some of the later mods developed for the Pixie II. Q1 is a Colpitts crystal oscillator using a reverse biased silicon rectifier as a varicap to pull the crystal frequency the 700 -800 Hz required to give a signal a pleasant tone when in receive mode. This function also gives a small range RIT to clarify signals when listening. The frequency offset is adjusted with W1, the 47K potentiometer.
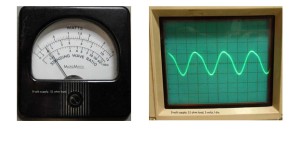
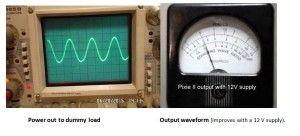
In transmit Q2 functions as a simple PA with a pi LPF output. This stage buffers the oscillator and increases power to several hundred mW. I measured 250 mW with a 9V supply, 500mW with a 12V supply (see photos). General purpose 2N2222 type transistors are frequently used in Pixie II circuits. I looked up the transistors supplied with the kit and was pleasantly surprised to find the kit manufacturers have gone to the effort of selecting components specific for local oscillator and power amplifier functions.
In receive, Q2 functions as the product detector in a direct conversion receiver with Q1 as the LO and U1 amplifying the detected audio to provide earphone volume. LSB as well as CW signals may be received.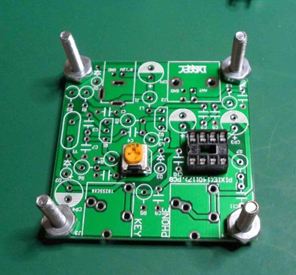
Start construction by inserting 6-32 x ¾†hardware in each of the corner holes. Head of the screw goes on the bottom (solder) side of the PCB. Finger tighten.   These screws act as legs that allow the PCB to rest flat when soldering components. If you plan to mount the PCB in a case this is the time to mark the mounting holes.
Solder the potentiometer and the socket for U1. If you also wish to use this pot as a RIT use wires and a 47 K potentiometer mounted on the “front panelâ€. Next solder the resistors, capacitors (polarity) and diodes (polarity) and inductors in that order. Solder the transistors. Solder the 3 mm stereo sockets the BNC antenna socket and the power socket. I measured all the disc capacitors in the kit and found that they are 20%. The inductors are also 20%. I added a ferrite bead on the lead of L1 to bring the inductance up to the nominal value. L2 was within 10% so I used it. I was not happy about using -20% value capacitors in the LPF so I purchased 1% ceramic capacitors at the local components shop for 15 cents each. It took about two minutes to wind a new 1 mH L2 inductor (15 t) on a T30-2 powdered iron (red) toroid. With the L/C meter attached I spread the windings till the exact value was found. Fix the windings in place with a drop of glue.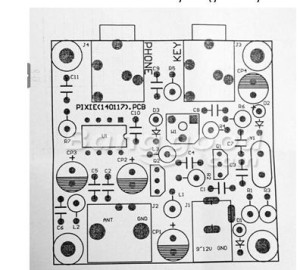
Solder the 7.023 MHz crystal (you may wish to look in your junk box for a crystal that will put you on a QRP calling frequency; 7.030 in EU and 7.040 in North America).
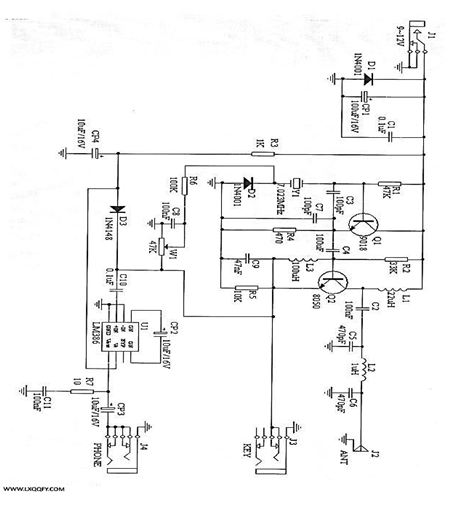
Measure resistance across the power input. Connect the 50 ohm 1 W composition resistor supplied with the kit or other dummy load to the antenna socket.  With a mA meter in series apply 9 – 12 V. Current should be approximately 15 mA. If it is much higher than 15 disconnect power immediately and check your work. (D1 provides reverse polarity protection so a 500 mA fuse might be in order.)  Insert a Morse key in J3. Listen for the oscillator on your station transceiver or connect scope probes across the antenna dummy load 51 ohm 1 W resistor supplied with the kit. 
If the oscillator and PA are working as expected insert U1, connect headphones and a 40m antenna. A 9V – 12 V battery works.
Phone another ham in your city and get him to zero beat your signal and then transmit. Adjust the 47K trim pot for a pleasant tone. You are on the air!
In the evening I connected a 9V battery, Air Canada complementary earphones and my 40m delta loop antenna.   CW stations from EU could be heard and tuned with potentiometer W1.
Now, where did I put that straight key that I used 40 years ago?
CW chirp issues were solved by: 1) Preventing a change in voltage across the varicap, D2, when keying by keeping potentiometer W1 in the middle of its range. 2) Addition of a 22 uF 25V SMT chip capacitor on the bottom of the PCB, across the terminals of the power input socket. To solder one side of the capacitor I scraped away some of the solder mask on the PCB — the other end went tight against the +ve lug of the power socket. (Check for shorts before applying power.)
RF power output with a 12 V supply was found to be 500 mW, as shown at left. In addition, the higher supply voltage yields a waveform appearing closer to a clean sine wave, (photos above) generating fewer harmonics.
Note: LPF: I checked for 2nd and 3rd harmonics and they are easy to find within the shack. I believe that higher quality components in the LPF will reduce harmonic radiation. However, another ham in the same city could not hear the second harmonic (this is my spectrum analyzer equivalent test).  So, even with sub-optimum suppression, the second harmonic will be at a level of approximately 0 dbm – not a level that will wreak QRM havoc on 20m and 15m CW (second and third harmonics).
On the air results.
Hams within a 200 Km radius could hear the QRP CW signal. After correcting the chirp issue reports were good. Surprisingly the direct conversion receiver also let me hear them easily, so 2 way QSOs are definitely possible. Listening on 40m just after dark let me hear most of the 40m CW band – all at once. Stations could be peaked by adjusting the 47K trim pot. Where a few individual CW signals could be identified I found them on my FT-450 – surprisingly they were not S9+ signals but pretty ordinary S7 signals, indicating that the direct conversion receiver is quite sensitive. Good sensitivity combined with poor selectivity effectively restricts 2-way communications use to daylight hours. In spite of the receive limitation, it is pretty amazing that two way communications are possible with such simple, low cost equipment.
Conclusion
Lots of fun for the money!
To download this original article click this link
Pixie II v5 for caarc


about 8 years ago
Anyone looking for ham radios I have a new condensed
site with lots of mobiles, portables and antennas.
http://www.hamradiocity.com